Sewing
I've been making clothes - three skirts and a dress so far, but have no pics of them yet. They were all machine-sewn.
However, here are some non-clothing projects.
However, here are some non-clothing projects.
This is the purse I carry every day, made from one of several pairs of jeans I got for $2 each at the thrift store. This pair was chosen for its size and the cool details like the patterned pockets and tag and another leather tag on the back. No pattern for the purse - I just cut the legs off at the crotch and sewed the bottom with a double layer of leg fabric for durability. The purse is lined with black ripstop nylon, which is very strong and also hides dirt nicely. The edges of all the denim and ripstop pieces were zigzagged by machine to stop any fraying before being sewn together. The handles are made from leg fabric tubes wrapped around the seams (which I had cut off), zigzagged by machine, and sewn to the purse by hand. The divider is made from the rest of the leg fabric and trimmed at the top with a colorful Kaffe Fasset quilting cotton.
I also sewed a tube of the same fabric around the inside top by hand, just below the waistband, where the lining meets the denim. It looks neater and adds another pop of color. The scrap-made flower covers an odd-looking spot left by cutting and re-sewing the crotch in front to give me the depth I wanted. It has frayed nicely but also curled up a bit, so I should add some more petals. I carry this purse every day, and people comment on it all the time. Probably the most useful thing I've made, and one of the best things about it is I can (and do) just toss it in the wash like a pair of jeans whenever I like. In the picture above, the purse is over a year old, was used almost daily in that time, and has been washed several times.
I made a similar but larger pattern and sewed a black leather bag with rust taffeta lining to carry when I travel, but it's a bit large, so it tends to get overstuffed and heavy. Also, the edges of the single strap need finishing, though no one seems to notice that. Petals got cut out for a flower to put on it, but my husband usually ends up carrying it because it's so heavy, so that isn't going to happen. Now that I think of it, the pattern is pretty different, really. I'll post a photo soon.
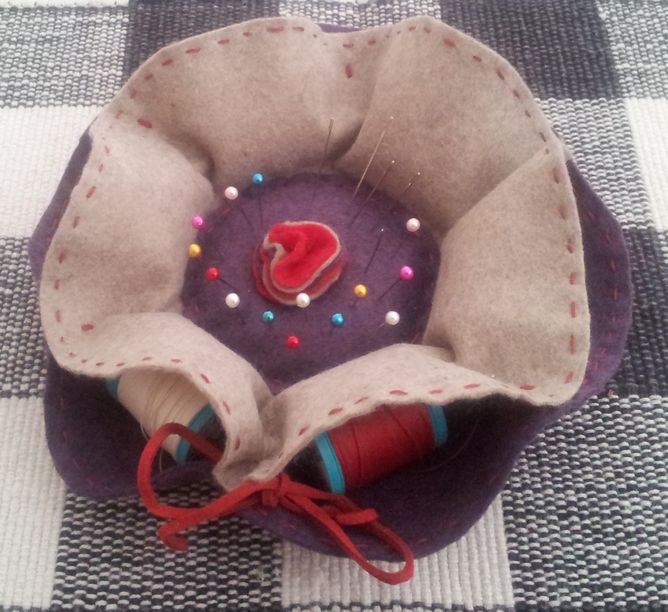
Here's a thread caddy made from a pattern in Zakka Style by Rashida Coleman-Hale, which is a great book. It works as a thread dispenser, holding 6 spools of thread steady as you pull, plus has a pincushion in the top. Very easy to make, and it's a simple matter to untie the bow to replace a spool when it runs out.

Next is a sewing kit also made last year. It is based on the one on the cover of Zakka Style, but I changed the pincushion and added Velcro so I can hang the kit open over the arm of an airplane seat and attach the pincushion in the middle in that position. Otherwise, the pincushion tucks into one of the pockets inside. I also made a small zipper pouch out of one of the pockets so when I hang the kit, small items don't fall out. Needle threaders and silicone grippers go in there, along with other small things. Another change I made was to make the whole thing a simple zipper pouch so I can actually carry a little project inside, along with a few spools of thread if need be. The whole thing folds in half and closes with a button I happened to have on hand. Below are some in-process pictures and a look at the inside.
Again, this was an easy project, just with more steps. The book has several pretty and practical ones that are a great entry to sewing by machine or by hand.
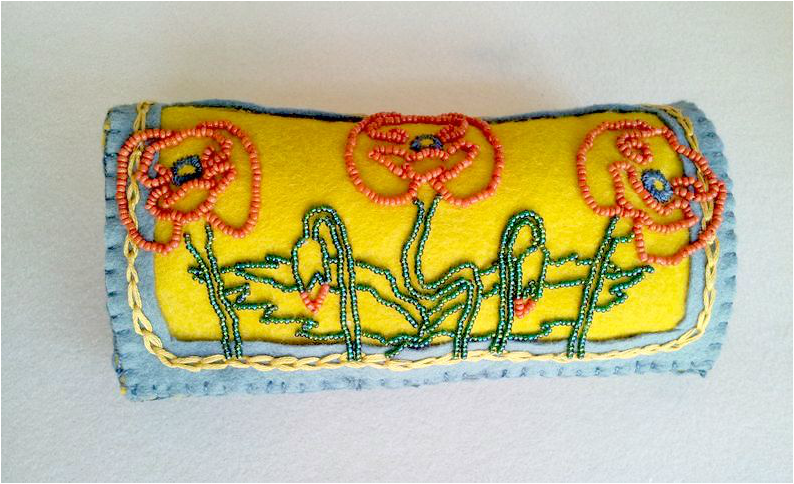
A more recent project is an eyeglass case made for my migraine-reducing glasses from Theraspecs. They fit over my prescription glasses, so are too big for any of the cases we had lying around the house. Creative opportunity! I love Art Nouveau and poppies, so got the flower patterns from my favorite design book, The Complete Book of Art Nouveau Designs from Search Press. The butterflies came from Cabinet of Natural Curiosities by Taschen, a great publisher. There are pages of insects, another favorite subject of mine. Below are pictures of the other surfaces.
The case is made from two sheets of felt, the gold one, which is a complete piece, and the slate blue one, which has cut-outs so it forms "frames" around the designs. I sewed the two sheets together after cutting, then used gold embroidery floss (three of the six strands) to re-frame each window. It was too dicey to transfer the patterns directly to the felt because markings may have discolored the felt and not come out, and it's better not to wet felt. So I used a photocopier to make the designs the correct size, then traced them onto tracing paper and cut the design out for each window.
The tracing paper was tacked onto the felt with very large stitches in thin sewing thread, then the lines were embroidered over the paper. To get good flowing lines, I loaded five beads on the thread, laid the thread down and put the needle in where the beads ended, then came up three beads from the end of that line, went back through those three beads and loaded another three beads on the thread before going back down. This produces very secure bead embroidery, but also keeps the lines from looking choppy where one group of beads stops and another begins.
I thought the lines would be much more graphic if the shapes were not filled in. The color palette is very limited for this same reason. Once each panel was stitched, I snipped the tacking thread and pulled it out, then took a needle and poked holes in the paper around the edges of the shapes and used tweezers to carefully pull out the paper around the stitched beads. The pieces were stitched together all around the outside with blanket stitch and DMC #5 perle cotton. Below are pictures of the process.
Update: The success of this project inspired me to make another one for my Mom. Click here to see it.
And here is a wallet I made a year ago because mine fell apart. Felt is a great medium because it's soft, easy to sew, and requires no hemming because it doesn't fray. That makes for quick projects. I had seen some nice wallets on the internet, and again, it was a creative opportunity. So I bought this felt wallet pattern from NapKitten on Etsy. She has lots of patterns, and not all for felt. Again, I made a few changes. The pattern called for an accordion coin purse on the outside, but because I carry so many cards, that would have made the wallet way too thick. Also, I don't carry that much change, so I cut a short zipper even shorter and used it to close an inside pocket.
Natalie Chanin, the designer behind Alabama Chanin, is a huge inspiration to me. I have all her books and love the aesthetic, with all the decorative hand-stitching, appliqué and reverse appliqué. So I decided a simple design in that style would be just the thing to help me practice the techniques for more ambitious projects down the road. Here is the finished wallet:
Natalie Chanin, the designer behind Alabama Chanin, is a huge inspiration to me. I have all her books and love the aesthetic, with all the decorative hand-stitching, appliqué and reverse appliqué. So I decided a simple design in that style would be just the thing to help me practice the techniques for more ambitious projects down the road. Here is the finished wallet:
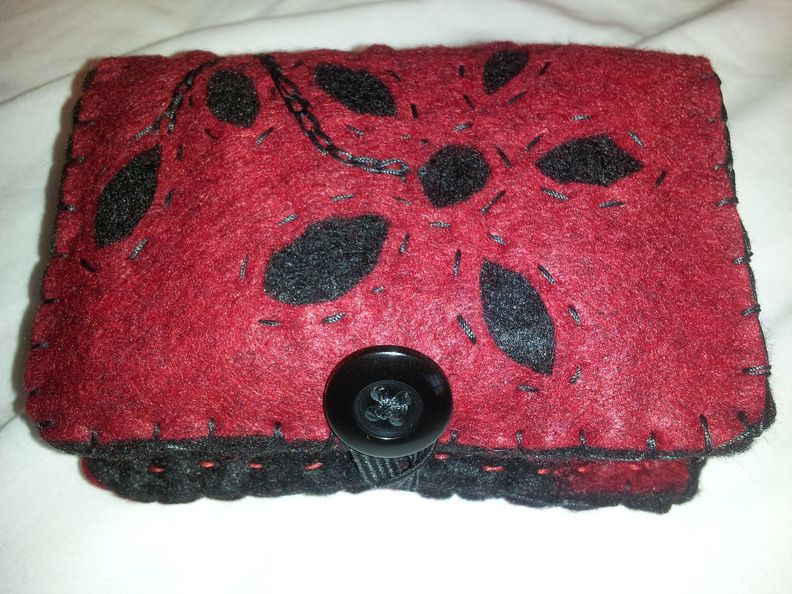
Like the eyeglass case, it is made with two sheets of felt and an even more limited palette of only two colors. We were on vacation, so I brought the pattern and materials from home and sewed the wallet itself in an evening in the hotel room. I drew a paper pattern for the reverse appliqué and cut the bits out of the red felt before stitching it onto the outside. The edges were done in blanket stitch with button and craft thread. The next day, I did all the decorative stitching with simple running, chain and stab stitches, doing everything from the outside and tucking the knots in between the layers because the wallet was already constructed. Some of the cut out pieces were used to make the designs inside. All this was done in the car and while walking around an outdoor mall - surprisingly easy! I love my wallet and use it every day. It has held up well for over a year, only developing a little pilling, which I trim off occasionally with tiny embroidery scissors.
I use all of these items regularly, and also notice myself reaching for the clothes I made before everything else in my closet, even though they aren't as "perfect". Sewing has been a very rewarding journey for me and I have plans for many more pieces.
